So have you ever gone out to do a series of geocaches only to find that you went straight past one that wasn’t part of the series? Or have constantly reminded yourself that there’s a quick ‘cache and grab’ a quarter of a mile down a side road by number 20 of the main series only to then forget once you are out in the field? When I am out caching with my friends, sometimes ensuring we do the right geocaches in the right order can be something akin to herding cats. We waste a lot of time working out which geocache we should be using next and ensuring everyone is on the same page.
If at first you don’t succeed…
Over the years we’ve tried a number of different solutions. We’ve set up a route on a laptop that we’ve fixed in the car, we’ve printed lists to carry along with us, I even spent some time trying to build custom routes to put on my handheld device.
There’s a number of ways to solve this, and your solution will very much depend on your needs as a geocacher but this is how my team of geocachers do it. Hopefully it will help those of you looking to do big days out.
I’m going to refer to this as an ‘itinerary’, mainly so not to confuse it with the terminology of routes, which is a feature on a lot of GPS handhelds. To all intents and purposes these are very much your route for the day in practical terms but it’s not a route as your GPS technically understands it.
GSAK
In order to create our itinerary we are going to need the help of GSAK (Geocaching Swiss Army Knife). If you are serious about geocaching it’s an essential piece of software. You can download it from GSAK.net and use it for free although after 21 days you will get a nag screen asking you to register. At $30 it won’t break the bank so I would encourage you to support the developer.
I’m going to assume that you’ve created a basic pocket query of the area and loaded it into GSAK.
In order to create our itinerary, we’re going to use one of the user fields. After some discussion with other geocachers, I went for User Data 3, mainly because we didn’t think this would be used for anything else. If you are using that field for something, just use a different user field.
The first thing we are going to want to do is get the User field to appear as one of the columns in GSAK. We do this by selecting ‘View’ from the top menu and then ‘Add / Remove Columns’. You should see a list of data fields on the left. Simply scroll down the list and tick the box next to User Data 3.
Clicking ‘OK’, should now show the column on the main screen.
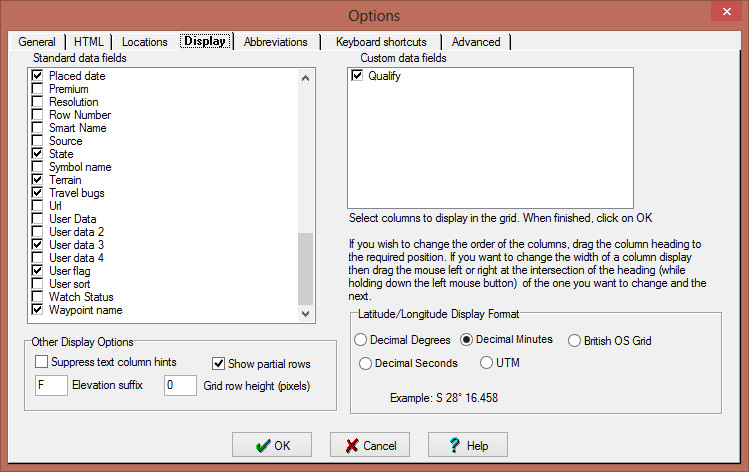
Adding a column in GSAK
Setting the order
What we do now is start typing numbers into this column to denote the order we want to do the geocaches in. I tend to use three digits, starting at 000 and going up. This is mainly because most of my itineraries have over a hundred geocaches in them.
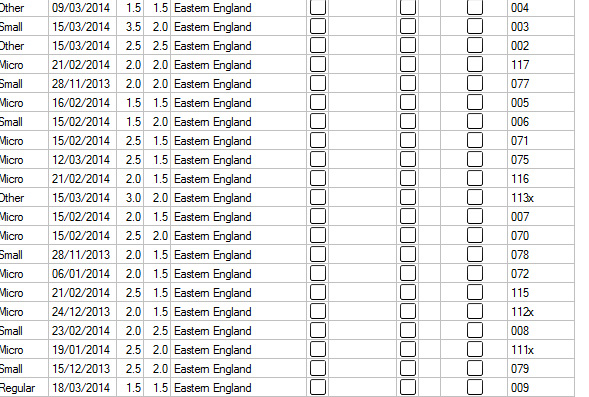
Setting the order of your planned route
After using this for a few weeks and finding it incredibly helpful, I thought it could even more so. I created a number of letter codes which denote different things.
My letter codes
C – Corrected co-ordinates. Means a puzzle or multi that’s co-ordinates are for the final
X – Extra. These are typically geocaches not too far off our trail that we could get if we’re making good time. We nickname them “out and backs” within our team. It also means that if we are making poor time or the weather has turned for the worse, we can skip these.
D –recently DNFed (logged as Did Not Find). I have, on occasion, found geocaches set to disabled, so if I am walking past a location with a disabled geocache it’s sometimes worth a quick look. But at the same time, if the previous six people before me haven’t found it, there’s a good chance I won’t either so it’s not worth spending a lot of time searching. This code is simply a note to myself and the team not to spend more than a couple of minutes looking. I will typically only put it on geocaches that’s had a number of DNFs over several dates.
M – Multi. It can sometimes be difficult to see the yellow multi icon when out in the field. We’ve had a couple of occasions where a geocache clue has made no sense only for us to realise that what we thought was a regular is actually a multi.
I will combine codes and my numbering system to get fields in User Data 3 which read something like ‘110xc’ (The 110th planned geocache for the day which is off the main track but is the final co-ordinates) or ‘007md’ (The 7th planned geocache for the day which has been DNFed a couple of times and is a multi).
You can create your own codes depending on the needs for you and your team. Yes, all this information can be found from going into the geocache description or looking at the logs or even changing the configuration of the dashboard on your GPSr unit but what we are trying to do is create a shorthand that makes it easier to establish these facts.
Export to GPX file
Once we are happy that we have our itinerary together, we then export it. I select ‘File’ from the main menu and then ‘Export’, and finally ‘GPX/LOC file’.
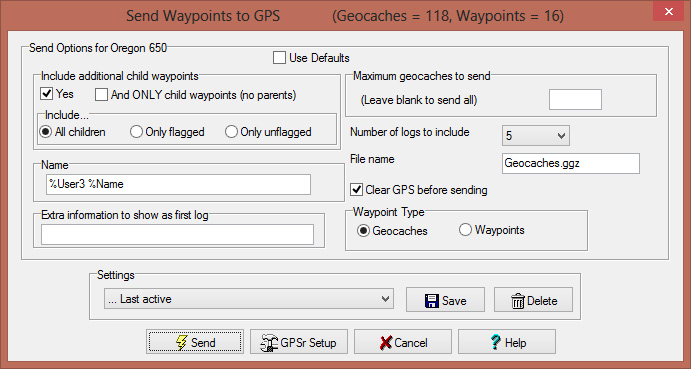
Here I make only one alteration. In the Cache Description field it says ‘%Name’ . I change this to read ‘%user3 %name’.
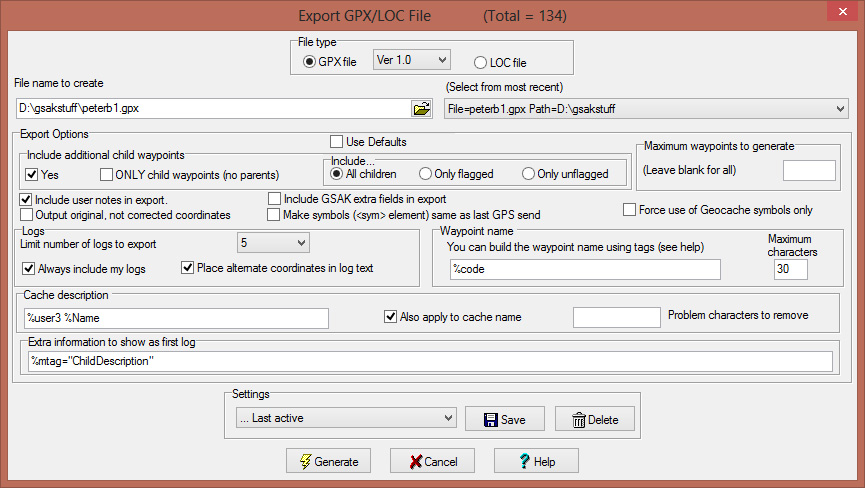
GSAK’s Export to GPX dialog box
If you are loading geocaches onto your GPSr (or your team import your PQ into GSAK before exporting to their GPS device) , you need to do something similar, altering the name field from ‘%name’ to ‘%user3 %name’
What you get
What this does is alter the name so instead of reading ‘Macy’s Park Cache’ it now reads ‘001 Macy’s Park cache’. That might seem of little benefit when you are doing a linear trail of geocaches all from the same series, but it means if you create your own plan for the day, combining geocaches from different series and geocache owners, your team won’t be asking you constantly, “which one are we doing next?” or walking past that trail you need to nip down to pick up a stray geocache.
Sending it all to your GPS
It may be that your personal style of geocaching wouldn’t benefit from this. Indeed, some days it’s not needed, but if you and your fellow geocachers are as disorganised as my crew and I then you’ll find it helps bring a little order to the day.


Great article – I do something very similar:
1. Install the GSAK Macro – Google Map V3 – http://gsak.net/board/index.php?s=995aff2b93309f0ba751e94e70dc54b9&showtopic=17505&st=20&#entry202592
2. Use the macro and you can click on the “+1” on the cache in the map and this increments the User Sort of the cache in GSAK automatically.
3. Once all the caches are identified, filter down the just the caches that have a User Sort >1
4. I print the list for the clipboard in the car so we can check them off. We use Geocaching with Geosphere on the iPhone for logging, etc.
I never thought you use the custom naming to identifying them within the GPS, nice!
Great tips Adrian! I really like the code suffix idea as well as the custom naming for GPS export. Thanks!
What do you do after you get home? Do you have to manually clear the userdata3 for all the caches you selected for your itinerary?
Hi Brian,
apologies for the delay in replying, I was away on vacation. If you do a global replace on userdata3 with a blank field, you can reset everything ready for your next itinerary. Hope this helps