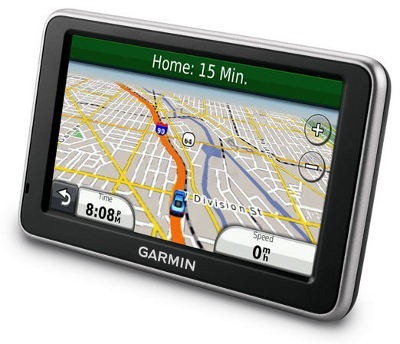
 The Garmin nüvi 2300LM
 is a lower-level model in Garmin’s 2300 series, bringing some of the best features from the 3700 series, minus the exorbitant price tag, including the ability to learn your preferred routes.
Like all models in the 2300 series, the 2300LM sports a 4.3” screen (the 2200 series has a 3.5” screen; the 2400 series offers a 5” screen). The LM in the model name stands for lifetime map updates. The 2300LM comes with preloaded maps of the contiguous US, Hawaii and Puerto Rico. Here’s how it stacks up against some closely…
Related models
- Step up to the 2350LMT to add lifetime traffic, lane assist, junction view, Garmin’s historical road speed database, and maps of Alaska, Canada and Mexico
- Going the other direction, drop down to the Garmin nuvi 2200 and you’ll lose the lifetime map updates and get a smaller 3.5” screen
- To see how the 2300LM compares to other models, check out my Garmin nuvi comparison chart
Much of what follows is adapted from my hands on review of the Garmin nuvi 2350LMT…
I’ll concentrate on newer features first, then a quick rundown of the more common features found on earlier-generation models, before wrapping up with my conclusion. Here goes…
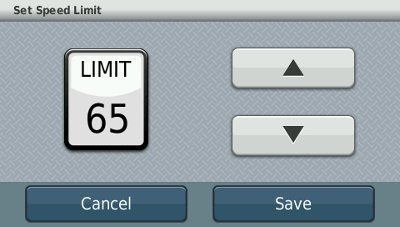
nuFeature: Speed limit adjustment
I’ve discussed this before, and I’ll refer you there for details, but the short story is you can correct speed limits when the device has them wrong.
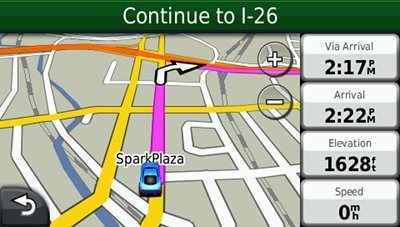
nuFeature 2: Via point data fields
Another new feature, is the addition of several via point options for the customizable data fields. You can see the “Via Arrival” option enabled in the top data field below.
myTrends
MyTrends is a little complicated. It does a couple of things. One, it figures out routine travel patters for you (think home to work and work to home). Hop in your car and the destination is pre-selected. More importantly IMHO, is the fact that it can learn your preferred routes. Ignore the 2300LM’s directions for a few days, take your favorite shortcut, and it should start routing you that way.
Here are some details on myTrends from Garmin’s support pages:
The myTrends feature is available on select Garmin products. When you save your regular destinations in your “Favorites,” your nuvi will, over time, begin to figure out where you’re going even without your telling it. Your nuvi will provide a predicted route which will display in the information bar at the top of the map screen. myTrends provides time of arrival and relevant traffic information in the information bar.
Please note: myTrends is a feature that does not work out of the box when you first begin using your device. In order to effectively use the myTrends feature you must meet the following requirements before myTrends will display arrival and relevant traffic information:
- Your frequent destinations must be marked as favorites in your device, i.e. Home, Work, etc.
- A regular pattern of driving habits must be established before myTrends will display on your device:
- Daily regular pattern of driving takes at least three days of usage
- Weekly regular pattern of driving such as a different destination on different days would take 2-3 weeks of regular usage
Example of myTrends:
Press the information bar at the top of the map screen in order to display alternative routes if one is available. Here you can press Go! to activate a route to your myTrends destination:
Once you press Go! the unit will begin providing turn by turn directions to your destination.
After you have an established pattern of driving habits your device will display a myTrend event within a two hour window. As an example if you leave work for home at 5pm each day, the myTrend event will display on your device as early as 4pm and as late at 6pm.
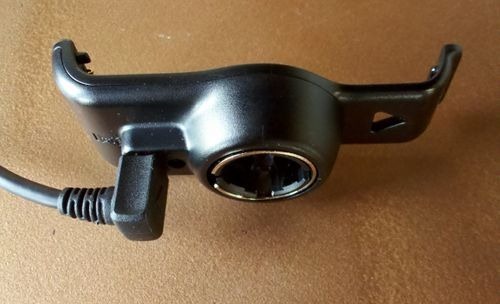
Powered mount
It’s nice to see Garmin putting a powered mount, one of my favorite features, on a mid-range navigator. Basically, this means that you don’t have to mess with the micro-USB connection every time you get in your car. I leave mine connected to a dashboard mount, and just throw the mount on the floorboard when I park.
Notable features from previous generation nuvis
Customizable data field display
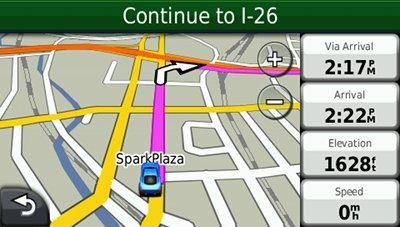
There are a couple of options here. Tap the left data field on the map screen to bring up a range of choices. These vary depending upon whether you are actively navigating or not. And if you go to Tools > Settings > Navigation > Automobile > Map Data Layout and choose More Data, you can shift the data fields to the right, picking up two more that you can modify, as shown below.
Speed limit display and warning
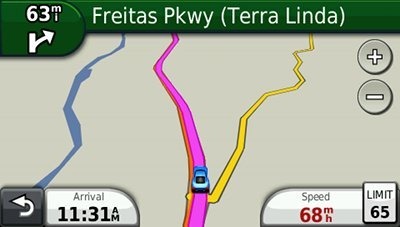
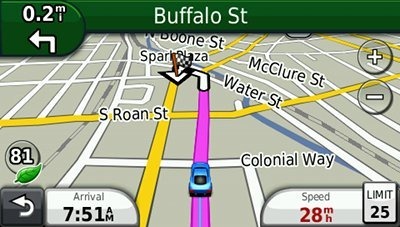
Back to something with good coverage, you’re likely to find speed limits displayed for even secondary roads. And your current speed field turns red if you’re over the limit. Unfortunately, there is still no way to customize this feature to have it change colors at 5 or 10 MPH over the limit. And as noted earlier, you can correct speed limits where you see errors.
ecoRoute
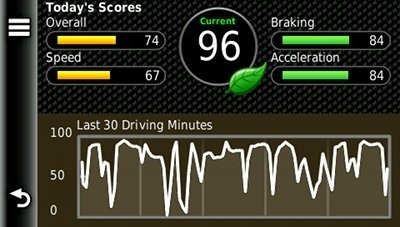
This feature adds a “less fuel” option to your routing choices and gives you fuel and mileage reports, estimated fuel cost for trips, and even a “driving challenge” to improve your fuel efficiency.
CityXplorer
CityXplorer add on maps offer advanced pedestrian routing options including mass transit, though don’t expect it to route you as well as someone who rides the subway every day.
Trip log
The trip log displays a thin blue line showing where you’ve been. This can be enabled/disabled, and the trip log cleared, by going to Tools > Settings > Navigation > Automobile > Trip Log. You can also access archived trip logs for a record of your travels.
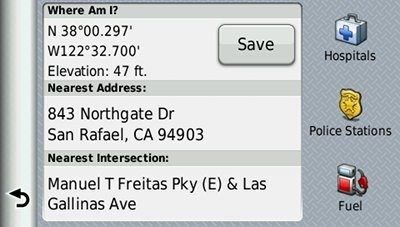
Where Am I?
You access this feature by tapping the car icon at your current location on the screen.
Multi-destination routing
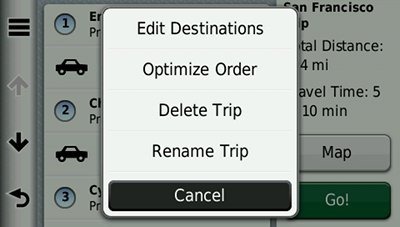
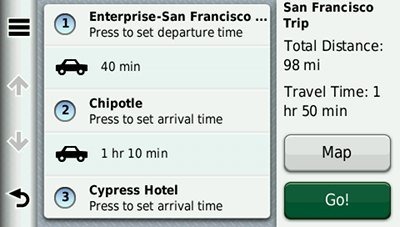
The 2300LM allows you to add multiple via points from Where To?, without going into the Trip Planner, but there is no route optimization option if you do it this way. To get that, you’ll need to use the new multi-destination routing format first introduced on the 37xx. Access it by selecting Tools > Trip Planner to create a route. Once a route is created, you can access the menu for the options shown below.
You can tap a via point to select an item and specify an arrival time and/or duration of stop. This is quite the useful feature. I plugged in the duration of several stops, the time I wanted to arrive at my final destination, and was able to easily determine when I needed to start my trip.
While you still cannot import routes from MapSource (though a firmware update has been promised that should bring this soon), improvements in the interface have made dragging destinations to change their order much easier.
Garmin nuvi 2300LM pros
- Lifetime map updates
- Powered mount
- myTrends learns preferred routes for routine trips
- Customization options
- Speed limit display, warnings and adjustment
- Multi-destination routing
Garmin nuvi 2300LM cons
- The only negative comments I’ve really had about the 2300 series involved the trafficTrends historical road speed database and the limited Junction View coverage, features missing from the 2300LM, so I don’t really have anything bad to say about this unit
Conclusion and recommendation
Garmin has rolled out another winner with the 23xx series, incorporating the best features from their top of the line units and providing additional features, while keeping the price tag reasonable. There is very little here not to like. Highly recommended.
More Garmin nuvi 2300LM reviews
- Consumer-authored Garmin nuvi 2300LM reviews
are being posted at Amazon
I’ll be posting more hands on GPS reviews as they appear, but in the meantime, here are some…
Other Garmin nuvi 2300LM resources
- The Garmin nuvi 2300LM owners manual
- Want to see how the 2300LM stacks up against other models? Check out this Garmin auto GPS comparison tool or my own Garmin nuvi comparison chart
- There is a dedicated Garmin nuvi message forum at GpsPasSion
- And another nuvi forum at GPS Review
- Five tips for nuvi newbies
- The official Garmin nuvi 2300LM web page
Compare prices on the Garmin nuvi 2300LM at these merchants:
- Get a great deal on the Garmin nuvi 2300LM at GPSCity.com
- Check the current Garmin nüvi 2300LM
price at Amazon
- Get the Garmin nuvi 2300LM Bundle w/ myTrends & Lifetime Maps
from Tiger GPS
- Check out the deal on the Garmin nuvi 2300LM at Abt Electronics
