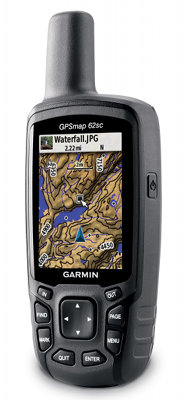
The Garmin GPSMAP 62sc adds a 5MP geotagging camera to the incredibly popular GPSMAP 62s, allowing you to snap pictures on the go, and have those images automatically tied to a location, without having to carry another device. You’ll also get added memory, NiMH batteries and charger and a picture viewer.
And like the other models in the 62 series, you’ll get the friendly new interface along with paperless geocaching and the ability to add custom maps and aerial imagery.
Quick links
Before we get into the details, lets look at some closely…
Related models
- Step up to the GPSMAP 62stc and you’ll get 1:100,000 scale preloaded topo maps for the US
- Or drop down to the 62s and you’ll give up the geotagging camera
- To see how the GPSMAP 62sc stands up against other Garmin models, check out my Garmin handheld GPS comparison chart
Portions of the following were adapted from my hands on review of the Garmin GPSMAP 62s.
Garmin GPSMAP 62sc display
With transflective TFT screens, the greater the pixel density, the less light that can be reflected back to the user. In order to maintain the bright screen found on the 60/76 series, Garmin left the resolution (160 x 240 pixels) alone. Screen size remains unchanged too, at 1.6 x 2.2”. The 62 and 78 series enjoy an increased range of colors that can be displayed (65,000 vs. 256 in the 60/76 series). The result is a bright display, not quite as large or as high resolution as the Oregon series, but with much better visibility in a wide range of conditions. I definitely noticed the lower resolution in using the 62 series, but these are the tradeoffs you make.
Garmin GPSMAP 62sc interface
Garmin hit a home run on the interface. They did an excellent job taking the best aspects of the Oregon series and making it work on a non-touchscreen unit. I think it is actually better than the Oregon except for when it comes to text-entry, where the touchscreen excels. The 62/78 series interface makes it much quicker to navigate main menu items.
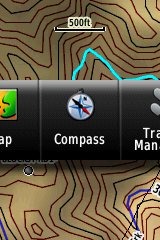 A Page Ribbon menu appears when you press the Page or Quit buttons (see image at right). Just like on the 60/76 series, these buttons advance through pages in forward or reverse order, respectively.
The Page Ribbon menu item that appears is the next screen in the sequence. After a second or two, that screen will automatically open. Or you can press Enter to go there right away, or continue pressing Page or Quit to advance to other pages in the sequence; stop on one and it will open. Page Ribbon items and their order can be customized. I prefer this interface to the old style, but you may not. In that case, you can set the unit to a classic style menu and get the old 60/76 series functionality, eliminating the Page Ribbon.
Newer features on the Garmin GPSMAP 62sc
The 62 series inherited a number of features from the Colorado, Dakota and/or Oregon series. These include the ability to utilize Garmin custom maps and BirdsEye aerial imagery, a tri-axial compass, new customization options, advanced track navigation, wireless data transfer and paperless geocaching. None of these were available on the 60/76 series; I’ll explore each in more detail.
Custom maps and BirdsEye imagery
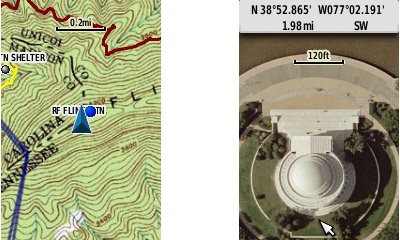
Garmin custom maps allows you to put just about any map image on the 62sc. Found a PDF park trail map online? Add it to your GPS! The image at left below shows a custom map — a USGS topo (raster) image. You can read more about this feature by checking out my posts on Garmin custom maps.
With Garmin’s BirdsEye aerial imagery program, a $29.99 annual subscription allows you to add aerial imagery to the GPSMAP 62sc. Since I don’t currently have a BirdsEye subscription, I’m showing a Jefferson Memorial aerial image using Garmin custom maps, but hey, you get the idea.
Tri-axial compass
Having a tri-axial compass means you don’t have to hold the unit level while navigating. The downside is that the calibration process is more complicated than that for a two-axis electronic compass. It’s the same procedure that is used on the Dakota 20 and Oregon x50 series — here’s a brief video I shot of it. The compass should be recalibrated every time you change the batteries in the unit. Like most units with an electronic compass, the 62sc also includes a barometric altimeter.
Customizing the Garmin GPSMAP 62sc
The 62sc offers lots of options for customization. I highly recommend you take the time to set up the following.
Page sequence – You can customize the page sequence by choosing Main Menu > Setup > Page Sequence. This will allow you to select which pages appear in the page sequence and their order. The Page and Quit buttons move forward and backwards (respectively) through pages. I usually put the map screen as my first page and the trip computer last; this way I can toggle between them with the page and quit buttons.
Profiles – The 62sc comes with recreational, geocaching, automotive, marine, fitness and classic profiles. You can switch profiles by going to Main Menu > Profile Change. Or create a new one by going to Main Menu > Setup > Profiles. Select the new profile to give it a name. Any changes you make in menus or other settings will be retained in that profile. So start changing things! Want track up when geocaching and north up when biking? No problem. How about a separate profile that just shows USGS topos or aerial imagery? The possibilities are nearly endless.
Data fields – You can change data fields on just about any screen that has these; simply press Menu > Change Data Fields.
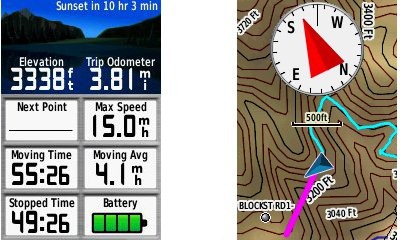
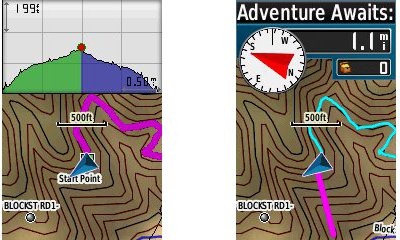
Dashboards – Instead of data fields (and in some cases in addition to), you can select a dashboard for the map, compass and trip computer screens. Choices (depending upon page) may include automotive, stopwatch, small or large data field, recreational, compass, geocaching or elevation plot. I’ve included screenshots showing the last four below. For the trip computer and compass pages, you access this via Menu > Change Dashboard. For the map screen, choose Menu > Setup Map > Data Fields > Dashboard. The one downside here is the small screen on the 62 series; using a dashboard can significantly reduce map real estate.
Track navigation
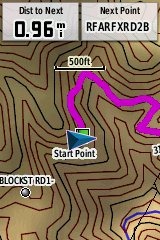 With the GPSMAP 62sc, you can select a track to navigate and a route will be created. Waypoints are automatically generated for major high and low elevation points, and start and finish; these and any user waypoints along the track are added to the route. I’m a heavy user of track navigation. If I head out for a trail I’ve never traveled before, I do a search online for tracks (favorite search terms are .gpx, gps, trail name, and park name) and load the track to the device. One advantage of this new track navigation feature is that, unlike typical backcountry route navigation, you’ll get an estimate of actual trail distance rather than “as the crow flies” mileage. Screenshot at right.
Paperless Geocaching
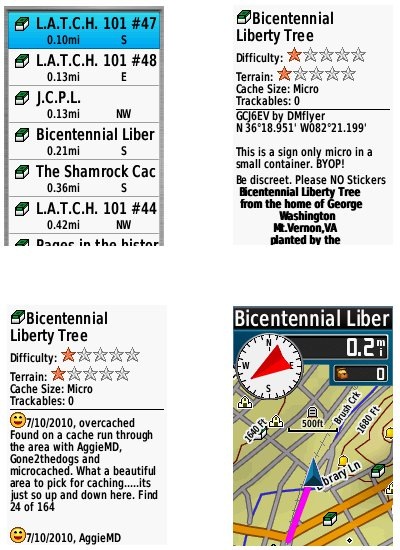
The 62 series is set up for full paperless geocaching support, meaning you can see the description, logs, and hint, and you can log your attempt (find, DNF, etc.) for later transfer back to geocaching.com. Speaking of which, full access to these features requires a premium membership at geocaching.com. Shown below, clockwise from top left: closest geocaches, geocache description, map with geocaching dashboard, recent logs.
 Wireless data transfer
The GPSMAP 62sc is capable of wireless data transfer with other compatible Garmin units. You can transfer waypoints, tracks, routes and paperless geocache details.
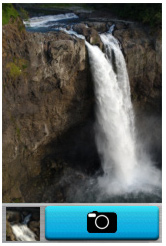
5MP geotagging camera
While I did not test the 62sc camera, it should be very similar to the one I wrote about when I reviewed the Garmin Oregon 550t.
Here’s what Garmin has to say about it…
Picture perfect: Whenever a picture is taken in stunning clarity with the 5 megapixel, auto-focus camera on GPSMAP 62sc, the photograph is geotagged – meaning the location is saved and encoded into the file – so that the geographical information can be used at any time as a point of reference or as a destination that can be reached through GPS guidance and directions. And because the GPSMAP family is waterproof to IPX7 standards, the built-in camera will still be snapping photos even in the worst conditions. Ample built-in memory (3.5 GB) allows you to take plenty of pictures on the trail and save the downloading and deciding for later. Once your GPSMAP 62stc is connected via USB, you can use Garmin’s free BaseCamp software to easily store and share your photos.
And here’s a video overview of camera operations:
Other features of note
Most of the following features aren’t that new, but are worth mentioning anyway:
Route, Track and Waypoint management 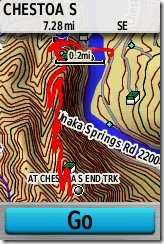
The GPSMAP 62 series has excellent route, track and waypoint management tools, including:
- Waypoints – The ability to project a waypoint, average location, set proximity alerts, and to reposition a waypoint at your current location.
- Tracks – You can choose to hide or show multiple tracks on the map, view an elevation plot, and give them a custom color (17 colors are available). The image at the right shows a track in red (a record of a previous trip). The color of the active track may also be changed. There’s a good thread at the GPSMAP wiki that delves more into track archiving and storage.
- Routes – You can view a map of the entire route, edit the route, reverse it and view an elevation plot.
Ability to utilize free maps
One of the most awesome things about Garmin mapping units is the huge number of free maps available. My favorite site for these is http://gpsfiledepot.com where you can find 1:24,000 scale vector topo maps for most states.
Auto use
While I would prefer the Oregon 450 or Montana series as a dual use unit, due to their touch screen (which is significantly larger too), the 62 series is capable of giving turn-by-turn directions when loaded with City Navigator maps.
Carabiner and mounting system
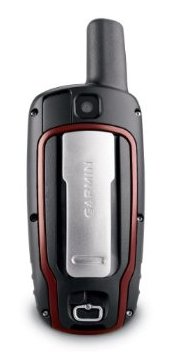
A rail mount on the back of the unit allows the included carabiner to slide onto the device. This is the same system used on the Colorado, Dakota and Oregon lines so the related accessories are interchangeable. I’ve heard some people say they don’t trust the carabiner mount, but after using it on my Oregon for a couple of years, I can say that I’ve never had any problems with it. Personally, I really like it and find it very convenient for clipping onto my pack.
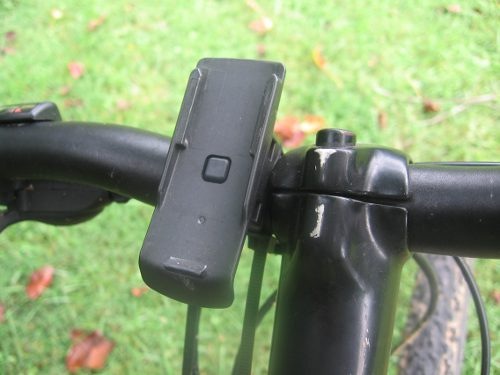
Garmin’s bike mount uses the same system, as shown below. I didn’t like this at first, since it’s just a zip tie system, but after a reader suggested using pliers (to pull the zip tie tight) and a screw driver (to press against the base of the zip tie slot), I’ve found that I can get it quite tight. I’ve never had a unit pop off the mount, though it is possible to slide it on incorrectly, so be aware of that. Also, low profile mounts such as this one seem much safer to the rider, in case of a crash, than ones that protrude.
Auto mount kits that utilize this rail mount connection are also available.
 Garmin GPSMAP 62sc tips
I imagine there are more, but here’s a few tips:
- Use the zoom buttons to jump a full page in a menu
- When entering a name, the zoom buttons will switch between keypads
- You can create a custom startup message (e.g., if found, please call…) by connecting it to your computer and editing the Garmin/startup.txt file
- The 60 series header showing battery status is gone; you can check the 62 series battery level by briefly pressing the power button, but you may also want to dedicate a data field to it.
Garmin GPSMAP 62sc pros
- Built-in 5MP geotagging camera
- Excellent menu system; fast access to features
- Bright screen
- Ability to load Garmin custom maps and BirdsEye aerial imagery
- Paperless geocaching
- Tri-axial compass
- Extensive customization options
- Advanced track navigation
- Wireless data transfer with compatible units
Garmin GPSMAP 62sc cons
- Small, low resolution screen
- Text entry more difficult than on a touchscreen Oregon
- Relatively heavy (compared to Oregon series)
Conclusion and recommendations
Recommended. Garmin has certainly nailed the user interface. Is it as good as the 60CSx under any and all conditions? Possibly not, but it does show a lot less multipath error when standing still. And it seems to settle down a lot quicker. Those two factors alone could make this a great unit for geocachers.
The 62 series models are some of the best handheld units available today. If you’re sitting on a 60CSx and have been wanting to get a Garmin with new features like BirdsEye aerial imagery, custom maps, advanced track navigation, and paperless caching, it’s probably time to pull the trigger.
Other Garmin GPSMAP 62sc resources
- Trying to decide between the 62 series and the Oregon? Maybe this will help.
- The Garmin GPSMAP 62sc owners manual
- This chart will show you how the Garmin GPSMAP 62sc compares to other Garmin handhelds
- A Garmin GPSMAP 62 and 62 series wiki
- The official Garmin GPSMAP 62sc
web page
Compare prices on the Garmin GPSMAP 62sc at these merchants:
- Check the current Garmin GPSMAP 62sc Handheld Navigator
price at Amazon
- Check out the deal on the Garmin GPSMAP 62sc
at REI.com, where satisfaction is guaranteed and members get 10% back on eligible purchases
- Find the Garmin GPSMAP 62sc at GPS City, one of our favorite low cost vendors
- Get the GPSMAP 62sc
direct from Garmin


I’ve searched all over the interwebs for an answer and just can’t seem to find one. Hopefully, this is the right place to ask, hoping you can help me out.
I have a GPSmap 62sc and I feel pretty comfortable with it’s operation. My question is around navigating tracks on the unit. As you mentioned in this post (http://gpstracklog.com/2010/07/navigating-tracks-on-the-new-garmin-handhelds.html) the Garmins now provide the ability to follow a track and get the true mileage instead of just as-the-crow-flies. You also mentioned that the unit will add in the high point and low point along the track.
On my unit, when following a track on rolling terrain, it seems to add high points and low points repeatedly. So, instead of seeing the distance to my next waypoint, I see the distance to one of many high points or low points along the way. When I look on the Active Route page, I see all of these highs and lows interspersed among my waypoints. The high and low points are of no use to me when navigating (I use the contour lines), but I really do prefer to see how far/ETA to my next waypoint. Is there a way to disable the high/low point function so I ONLY see my waypoints? If not, is it possible to have the unit read the map as if it were “flat”, thus having no point higher or lower than another?
Thanks in advance…let me know if I’ve posted this in the wrong place or feel free to move it where it may belong.
There is no way to disable the high/low feature, AFAIK. If you remove any maps with digital elevation models it may leave them out. Otherwise, I would try going into active route and select the next waypoint, but that may just give you straight line routing.
Will be visiting Europe in Aug., 2014, seeking advice for best combo GPS for auto and walking. I have several older Garmin models, but not tied to that brand exclusively…thank you for this great site….Tom
http://gpstracklog.com/2012/03/the-best-garmin-nuvis-for-pedestrian-navigation.html
But all auto devices have very short battery life.
hi i need in 5 pcs GARMIN GPSMAP 62SC . Do you have this model pls tell me.
thank’s advanse!
hi ! i need GARMIN GPSMAP 62SC. Do you have this model , pls tell me.
Thank’s advanse !